Wednesday, July 31, 2013

Perspective

I was telling someone the other day that I sometimes find myself thinking like a camera.  Like "what is my f-stop going to be today?"  Nerdy?  Maybe.  But that's what happens after a while.  
An important aspect of thinking like a camera is thinking in 2 dimensions.  I don't think we realize how much we interpret what we see.  We experience a moment in multiple dimensions, with sounds, smells, temperature, eyes with crazy big depth of focus, minds that interpret all of this and throw it together in a thing we call an experience.  
With photography, we are trying to capture the experience.  But it demands that we simplify it to the essentials.  After all, we lose so much of the whole human experience.  The trick is to bring it back with the image. 
No doubt, a picture is a split moment in time from a single perspective.  So how do we maximize our perspective of the experience to a single image and communicate the experience.

TIPS
1 - Get down (or up) to the eye level of your subject. 
It's not critical to be dead even with your subject, but as you get closer to the eye level of your subject, the person viewing the image can see more closely what the subject is seeing and experiencing.

2 - Change your angle.  
As we move around our subject/s we can get a completely different feel for what is happening.  What is hidden in one angle can be the center of our attention from a different angle.

3 - Make sure to focus on the action. 
You can use auto focus, manual focus, face detection, 3-D tracking, or any of the other great focus tools that come on cameras now.  The trick is to find out how you and your camera focus on that sweet spot where the action is.

EXAMPLE
Today's example: this was at a family reunion on the ranch in Wyoming this month.  My son was completely engaged with the cats.  He must have spent hours with them (and there are plenty of them around the ranch).  I wanted to capture the fun he was having.  
In this image, he had found a feather of a magpie and was toying with the cat.  Here's what I saw from one angle as I approached.  I wanted to keep my distance at first as to not diffuse the interaction.

In this first image, I knew what I saw, but there was more to be had.   From this perspective, the interaction was hidden, the background was distracting, and the experience was lacking to say the least. Even the lighting was off.


As I moved around the subjects and kept shooting, I was able to capture the interaction, fill the frame with the experience, and maintain the focus on the subject.  And the even lighting in the shade was a lot more aesthetic. 

No matter what camera you are shooting with, meet your subjects at eye level, move around to get the angle that best captures the action, and make sure you focus on where the action is.

Happy shooting!


Parting shot...

from later that night on the ranch.

Saturday, February 2, 2013

Rim Light Portrait

In the dining room with the 70-200mm with bounced light.

The setup is this... grabbed my D600 with 70-200mm lens. Zoomed all the way to 200mm to capture the detail in the eye.

Had to take about 7 shots due to subject eating while I was taking this -hence the Nutella on his face

The light was from sunrise coming directly in the window and bouncing off of a glass frame on the wall.  The light in the eye doesn't bother this guy while eating... when he's hungry, not much gets in his way.


 Process: check the ISO ... 400 ... ok
take self timer off from last nights shots of the temple
put it in A priority and change fstop to 3.5 - don't want any more focus than I need
change focus to zones instead of auto because Auto puts focus on closest item (and I don't want that ear in focus necessarily)
put focus square over subjects eye
click away
chimp and it was a little too light so I set my EV to -1.0 --- I do this because my meter is metering for shadows, making the highlights blown out.
A couple more shots
take to Lightroom. In Lightroom - decrease exposure by 0.5 and hit it with Matt's Edgy Look (hard edge) - as found here

pic of the day

Thursday, January 10, 2013

Computer history

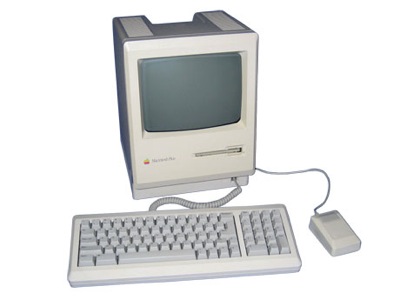
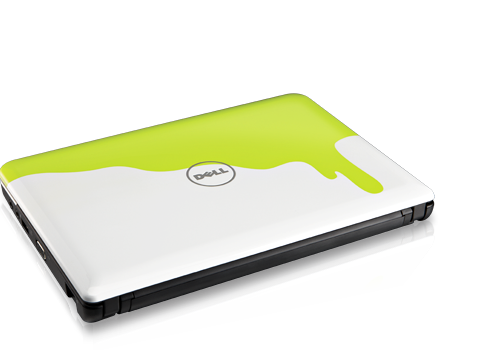
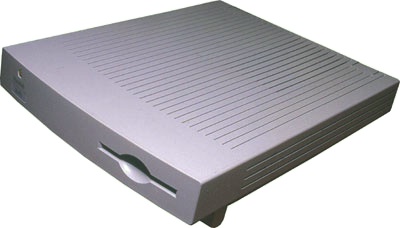
The Computers we have owned: Just for the record This was my first Mac - although I had worked with the Apple IIc and IIe the summer before. Owned Powerbook for 4 months, then sold, and purchased Performa 605 (used) This was my first computer after I was married This one replaced our iMac DV and didn't last as long as I had hoped it would Owned MacBook for 1 week. Sold it for what I bought it for and then went with my current desktop iMac We also have owned 1 white ipod 10Gig, 1 ipod nano 1Gig, 1 ipod shuffle 4Gig, 1 ipod nane 8Gig (from recalled 1Gig), 2 ipod Touch 2nd Gen, 2 ipod Touch 4th Gen, and 1 ipad Retina. We have also bought a Mini10v Netbook and a Dell tower i5
Wednesday, August 24, 2011

evening lighting

we were on our way back from dinner with the kids and the sun was behind the clouds before sunset... so i had to grab the camera, a flash, and the reflector.
i am not fond of light backgrounds outdoors... just a personal taste i have developed... especially around the head of my subjects
so i chose the tree as the background... that means getting lower than my subjects because the tree is fairly close (say 15-20 feet away from subject)

i grab my 70-200mm lens... i have really learned to enjoy this lens for personal portrait work

i have my wife grab the reflector and my SB800, which is incidentally triggered by the cactus v5
i find the cactus just right for my needs with the SB800

since i am shooting A mode and my fstop is around f3.2 and ISO 200, so i guess at 1/4 power.  my wife is holding the flash in one hand in front of the reflector (which is on the silver/gold mixed side) to match the warmth of the almost-sunset.   she stands about 6 feet away from the subject

here's the shot...

the sun is coming in from the subjects left side and my light is popping from subjects right side

i am trying to match the sunlight in intensity (a nice thing is about using strobes with sunlight is that they match color value quite well versus the mixed lighting you get with indoor lights)
also important to note here is that my exposure value is at -1 2/3 and i am on pattern or matrix metering
this exposure value allows me to pop my subject in brightness by decreasing the ambient light (the items not influenced by the flash) and then correctly exposing the subject
---we have to be careful of the shadows on the subject brought by the flash... the sun is a softer light source than the bounced flash -as evidenced by the softer shadows on the subjects left cheek/neck

next image... 
no flash... only ambient light
settings --- keep the ISO at 200, still bright enough for that, even with 135mm zoom
also keep the A priority and then set the EV up to -2/3  because it's all natural light now and i don't have that fill flash to compensate for the decreased EV
shooting now at f2.8, which it could be argued is giving me too short of a focal length (as evidenced by baby in focus while mommy is out of focus (slightly))


i am still not placing the light directly behind me... instead i am adding some depth by having it at about 5pm if 12 noon is at the subject
in this case, we can add some vignette around the edges to enhance the light on our subject and potentially even use some gradients with exposure decreased (here i went to LR and used 3 gradient filters with decreased exposure values of about -1.2


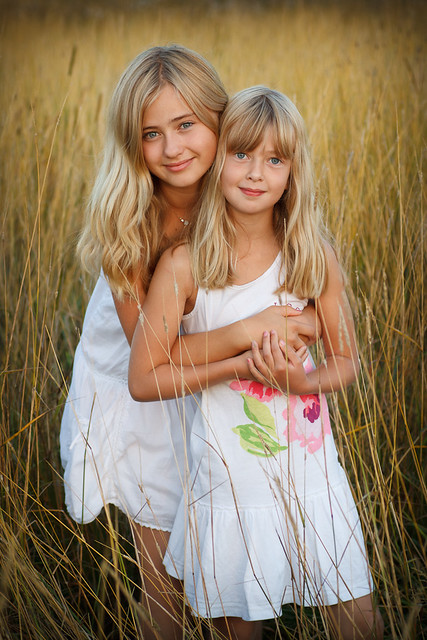
pic of the day
you can almost see the setting sun in the eyes of the subjects here
that evening light combined with the reflected sunlight behind them off of the grain creates a very soft  and warm light


Wednesday, August 17, 2011

silhouette

I have a challenge for you.  Try a silhouette.  I haven't done much with silhouettes.
But a few things that are fun about the silhouette is that it forces you to simplify.  The subject is simplified to an outline.  The lighting is simplified to simply underexpose your subject.

Put your camera in M mode, if it's not already.  Let's go with ISO 200, f4 and shutter speed of 8000.
Get your subject between you and the sun.  And you may find the focusing is a little difficult.  The focus on the camera works best with contrast.  So if it is only seeing the dark (underexposed) subject, it can struggle to focus.  Manual focus may be necessary.
Play around with the shutter speed, maybe go down to 4000.
Even play around with the f stop.  If you hit an fstop of f16 you could get subject and your background in focus.  Remember to slow down your shutter if you do that.
Another important note is to keep the background fairly well lit.  You can really lose your subject, as in my example here, if the background has a similar light (or dark) value.

ISO 200, f4 at 1/8000 95mm

Here is another attempt but with better composition with my background... or as Cliff likes to say, juxtaposing the subject with the background.
ISO 200 f4 at 1/4000 116mm

Remember that your background really speaks in a silhouette.

Happy shooting... would love to see some links in the comments to you silhouette shots.

PIC of the Day: This shot at ISO 100, f5.6 at 1/2000  300mm


Saturday, August 13, 2011

quick tip

When shooting skies, make sure you try a few with a really wide angle lens.

I find that when I shoot wide angle, it accentuates the drama and movement in the sky.


This was shot at 11mm from my front porch. (Tokina 11-16mm f2.8 lens with a D300s)

Monday, July 18, 2011

manual exposure

Have you been shooting in Program or Auto mode for quite some time now?  And you've been afraid to try manual mode.  Skies are a great subject to experiment with Manual exposure mode.  Point your lens at the part of the sky you want to meter for and play around with the fstop and shutter speed, keeping your ISO set between 200 and 400.  I have found that oftentimes skies look more dramatic when they are under exposed.  This shot was taken in South Dakota at ISO 400, f4.0 and 1/750 sec.  I thought to crop the trees out, but then I like the balance they give to the dark part of the sky.  In addition, the shapes of the clouds are similar to the shapes of the tree branches.
This was taken at the same time but more to the East
And one more...

Pic of the day: I took the liberty of running a little noise reduction on it.  But I really like the inclusion of the multiple layers and the great choice of foreground .  Notice the thin line of black at the bottom contrasting with the white on the top of the image.  Great shot!